How to reupholster a dining room chair
Published 1:30 am Saturday, October 6, 2018


Home
By Mitchell Chapman
One of the simplest projects a DIYer can do is to re-cover dining room chair seats. Yet often the finished results are amateurish at best.
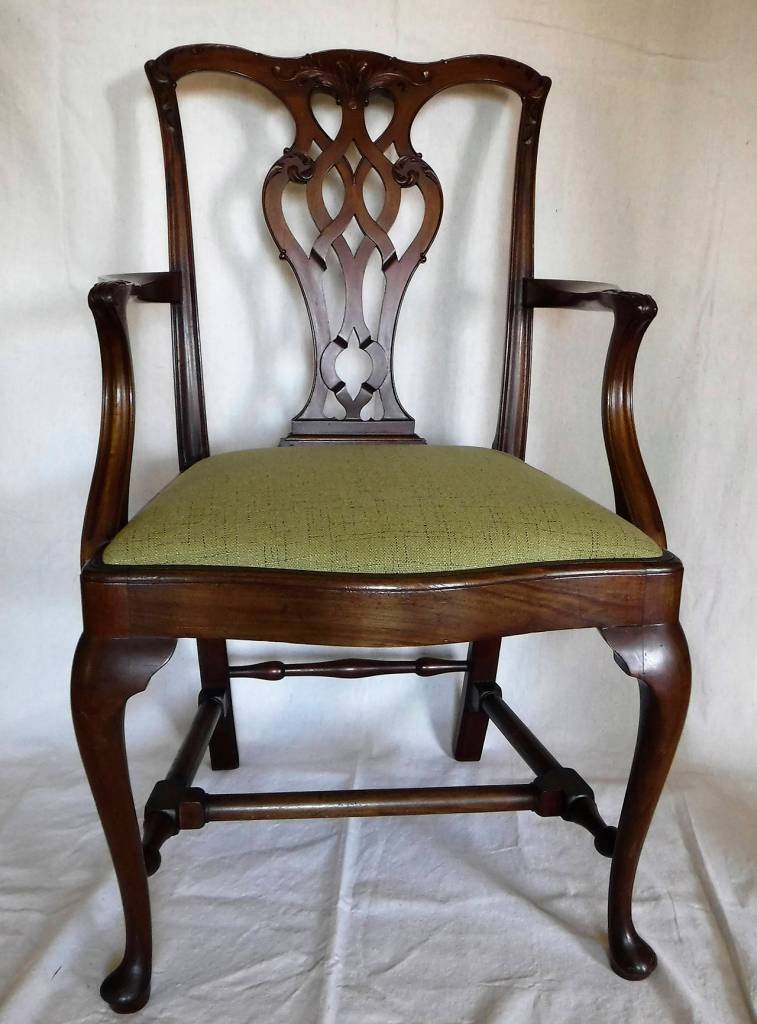
Here’s my step-by-step guide to reupholstering a sharp-looking dining chair seat. The chair I worked on is solid mahogany, purchased at Earthwise in Aberdeen. The frame was in great shape and only needed a coat of wax.
1. Start by removing the seat from the chair frame.
2. Remove the black or gray dust cover on the underside of the seat, if there is one.
3. Remove the upholstery fabric. Newer chair seats will have staples, while older chair seats may have upholstery tacks. I sometimes use a flathead screwdriver to pry up staples or tacks, then use pliers to pull them out.
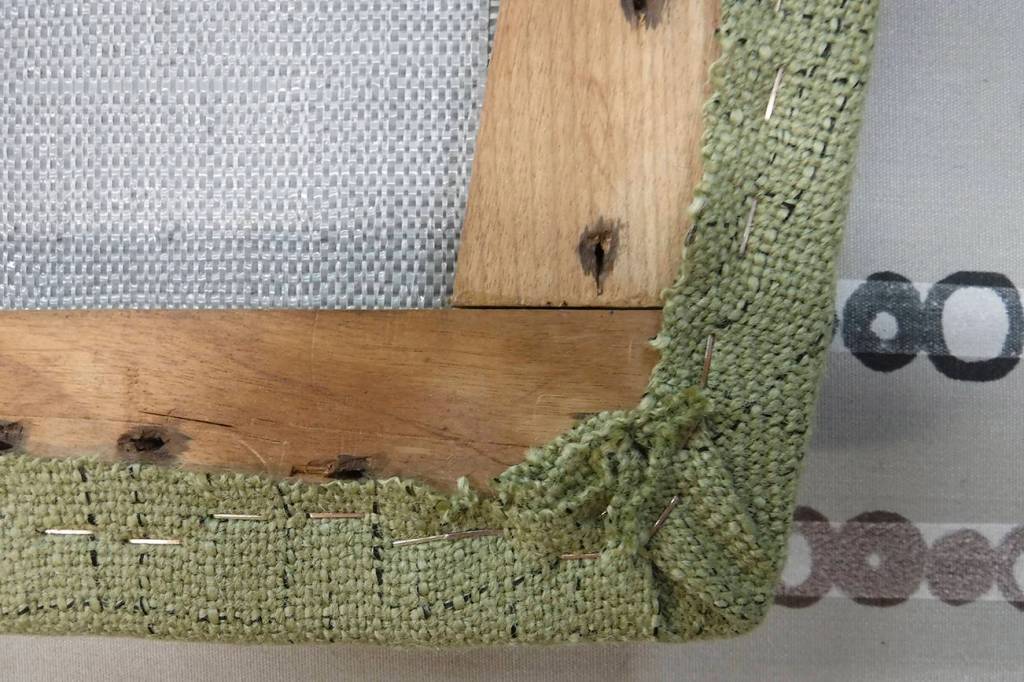
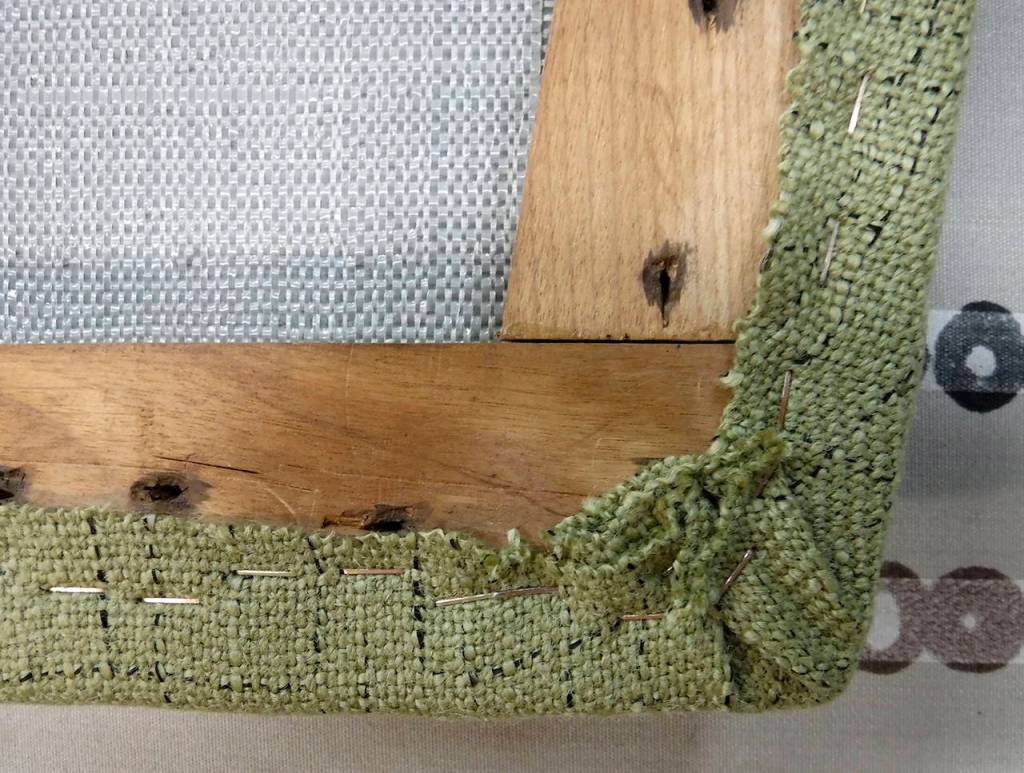
4. The seat frame will be a solid piece of plywood or particle board. It could also be a frame that has webbing woven across it to support the stuffing. If you need to replace the webbing, buy the jute webbing sold at fabric or craft stores.
5. Examine the seat stuffing. Newer chairs will have foam with white Dacron over it. On older chairs, the seat may have been built up with plant fiber or animal hair, with one or two layers of cotton over that.
6. With foam, if it isn’t deteriorated, remove the old layer of Dacron and replace it with a new layer. You can use spray adhesive to attach the Dacron to the foam, or you can staple the Dacron to the underside of the seat frame.
7. With animal hair stuffing, you can either reuse it or cut some new foam for the frame. If you choose the latter, buy quality 1-inch foam that is medium to firm density. Put your frame on the foam and trace around it with a permanent marker. Then cut the foam using an electric carving knife. (Be sure to hold the knife as upright as possible.) You can use scissors, but I find they don’t do as good a job. If you are reusing the original stuffing, then peel off the old layer of cotton and throw it away if it is dirty. If it’s not dirty, you can just add another layer of cotton or Dacron. I prefer using Dacron because the fabric slides over it more easily.
8. With the foam or stuffing in place and covered with a layer of Dacron or cotton, you are ready to upholster the seat. You can use the old fabric as a guide for cutting a new piece. Make sure there is enough around the four sides for you to pull the fabric tight and then staple it. If you are using a fabric with a pattern, it is critical that you get the pattern centered on the seat. Once it is centered, temporarily staple the fabric in the middle of each side. This locks the pattern down so it won’t shift while you upholster the seat.
9. Work from the center of each side to the corners. Keep flipping the seat over to be sure your fabric isn’t crooked or that you haven’t pulled it too tight. Work a little on one side and then do a little on the opposite side. This keeps you from pulling the fabric off center.
10. As you work your way around the seat frame, you will staple the four corners last. You can create a small pleat to finish the corner. Or, you can pull the fabric tight at the corner then twist it under the frame and staple it. This usually results in a cleaner look.
11. Finally, staple a dark-colored fabric over the underside of the seat. This acts as a dust cover and makes the seat look finished.
Helpful hints
Buy quality foam. If necessary, go to Keystone Bros. in Seattle. They sell professional quality foam to the public. Poor quality foam wears out quickly.
Look on eBay to buy upholstery tools and upholstery staple guns. Do not use the hand staple guns; they don’t have the power you need. Use an electric or pneumatic staple gun. You can buy the staples online easily.
Be careful removing the old staples or tacks. The tools sometimes slip when you apply pressure, and it’s easy to cut yourself. Wearing gloves helps.
If the old foam has deteriorated into dust, wear a dust mask. You don’t want to breathe that stuff. Get that deteriorated foam into the trash quickly and clean up your work area.
For six seats, plan on using approximately 3 yards of small-patterned or solid-colored fabric.
Now get busy and start re-covering your dining chair seats. The holidays are fast approaching, and you will want this project done early so you can focus on your entertaining plans!
Mitchell Chapman lives in Montesano and enjoys DIY renovations, interior design and home furnishings. He’s been an “armchair” interior designer for more than 25 years. He can be reached at GraysHarborHome@outlook.com.